
In this post, I will share my experience “shucking” Seagate Expansion Desktop drives for putting them in my home server. But, before we get to the actual post: a word of caution.
But what is shucking?
Shucking means removing a harddrive (HDD) from any sort of casing, mostly USB adaptors. It is a very popular thing to do for home servers, since (for some reason), USB drives are often times way cheaper than internal drives without USB adaptors.
Why are USB drives cheaper than internal drives? Well, I don’t know the exact reasoning behind this (and I doubt anyone outside the harddrive manufacturer’s marketing department really does), but some kind soul on Reddit suggests that it might come down to multiple factors:
- Price discrimination: Techies who know how to handle an internal drive are likely to pay more for it
- Warranties: It seems like on some internal and external drives, the warranties differ
- Binning: Internal drives might be of a marginally better quality
- Competition: More people (in the consumer market anyways) buy external drives because they have laptops, don’t know how to put the drive into their PC or some other reasons. This means that there is more competition on the market for external drives, which means lower prices
Some or none of these theories might be right, but internal drives being more expensive than their external counterpart is a known fact.
So how do I shuck those drives?
The process may vary depending on the external drive you buy. I’d generally recommend going with Seagate when you definitively want to shuck the drive, just because those are known to be shuckable without any issues or extra work required. Some Samsung drives don’t have a SATA connector but only USB, which is horrible and some Western Digitals require the pin-3-trick to work when directly attached via SATA. Note that I’m not affiliated with Seagate whatsoever and I also use some Western Digital drives and did not find any quality difference between the two manufacturers.
So, now that you bought you (Seagate) drive, the first thing that you want to do is to plug it in and spin it up. Always test your drive bevore shucking it!. The reason is simple: If you forcefully remove the drive from its case, you’ll (most likely) void every single warranty on that drive. So copy a few files or ideally even issue a full drive test.
After you did that, you can now go ahead and grab some sharp tool. I used a swiss army knife for prying, but even a kitchen knive should work. Carefully insert the sharp object into the seam along the left (or right) side, as seen in the image below:
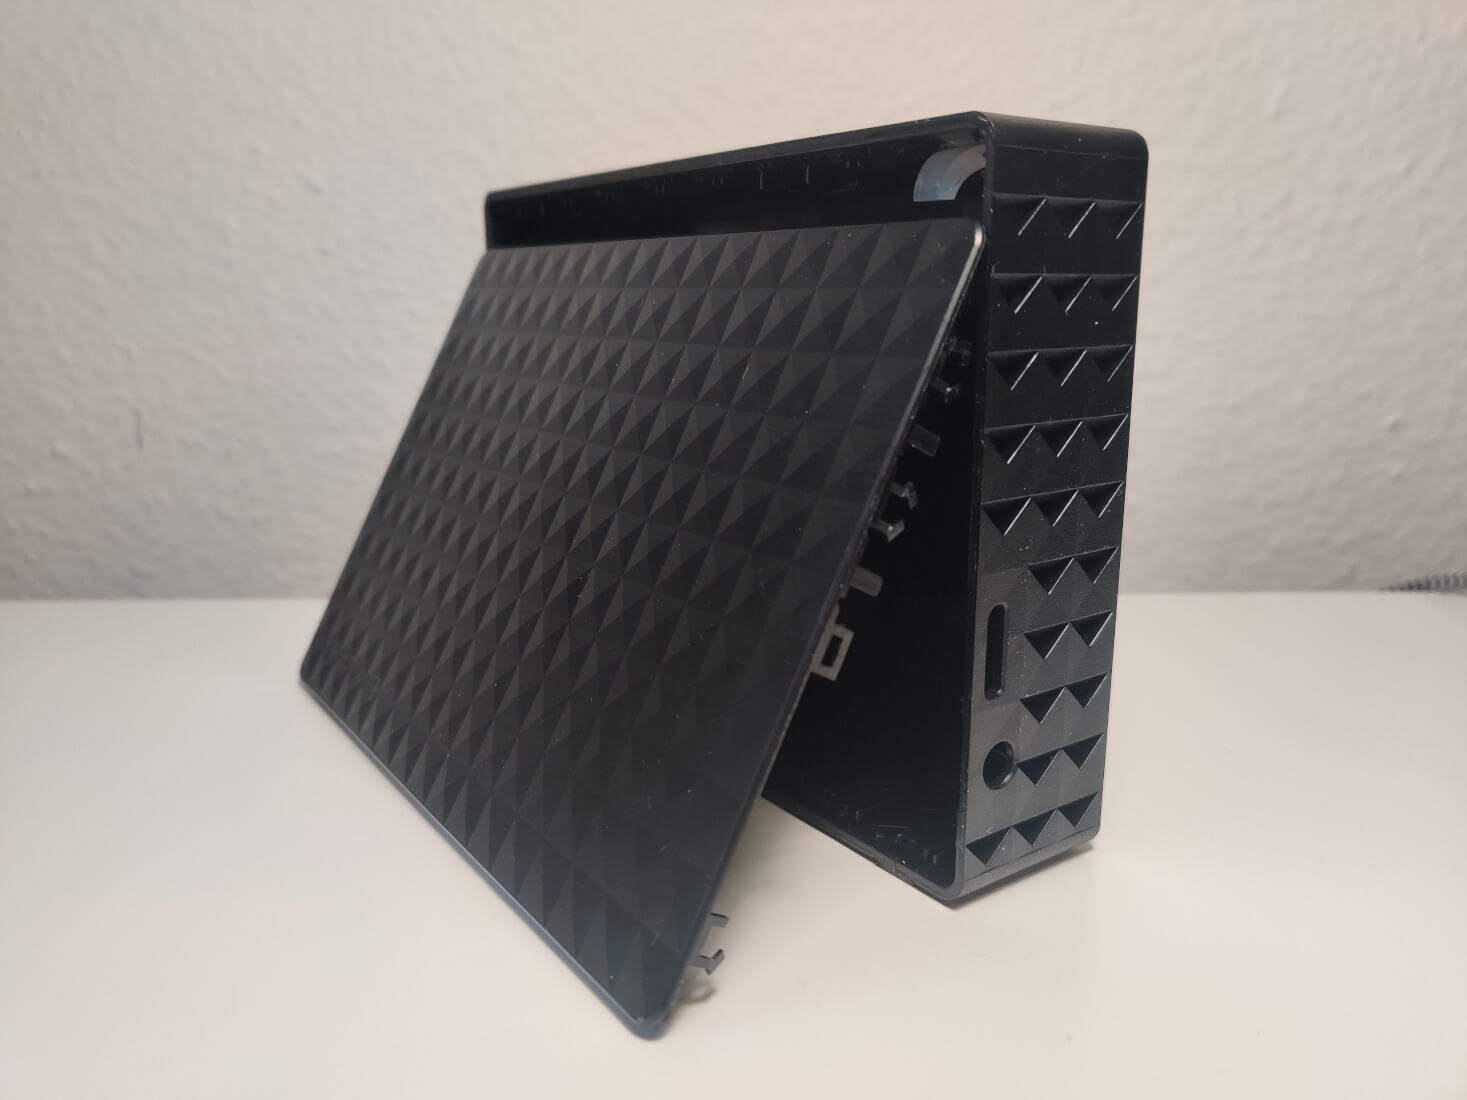
Please be careful to firstly not cut yourself and secondarily not dropping your drive or handling it too harshly, as that might damage it. Move your kutting tool all along the edge so you can hear the plastic tabs popping. Most of them will break, no matter how careful you are. I think they are designed that way deliberately by Seagate.
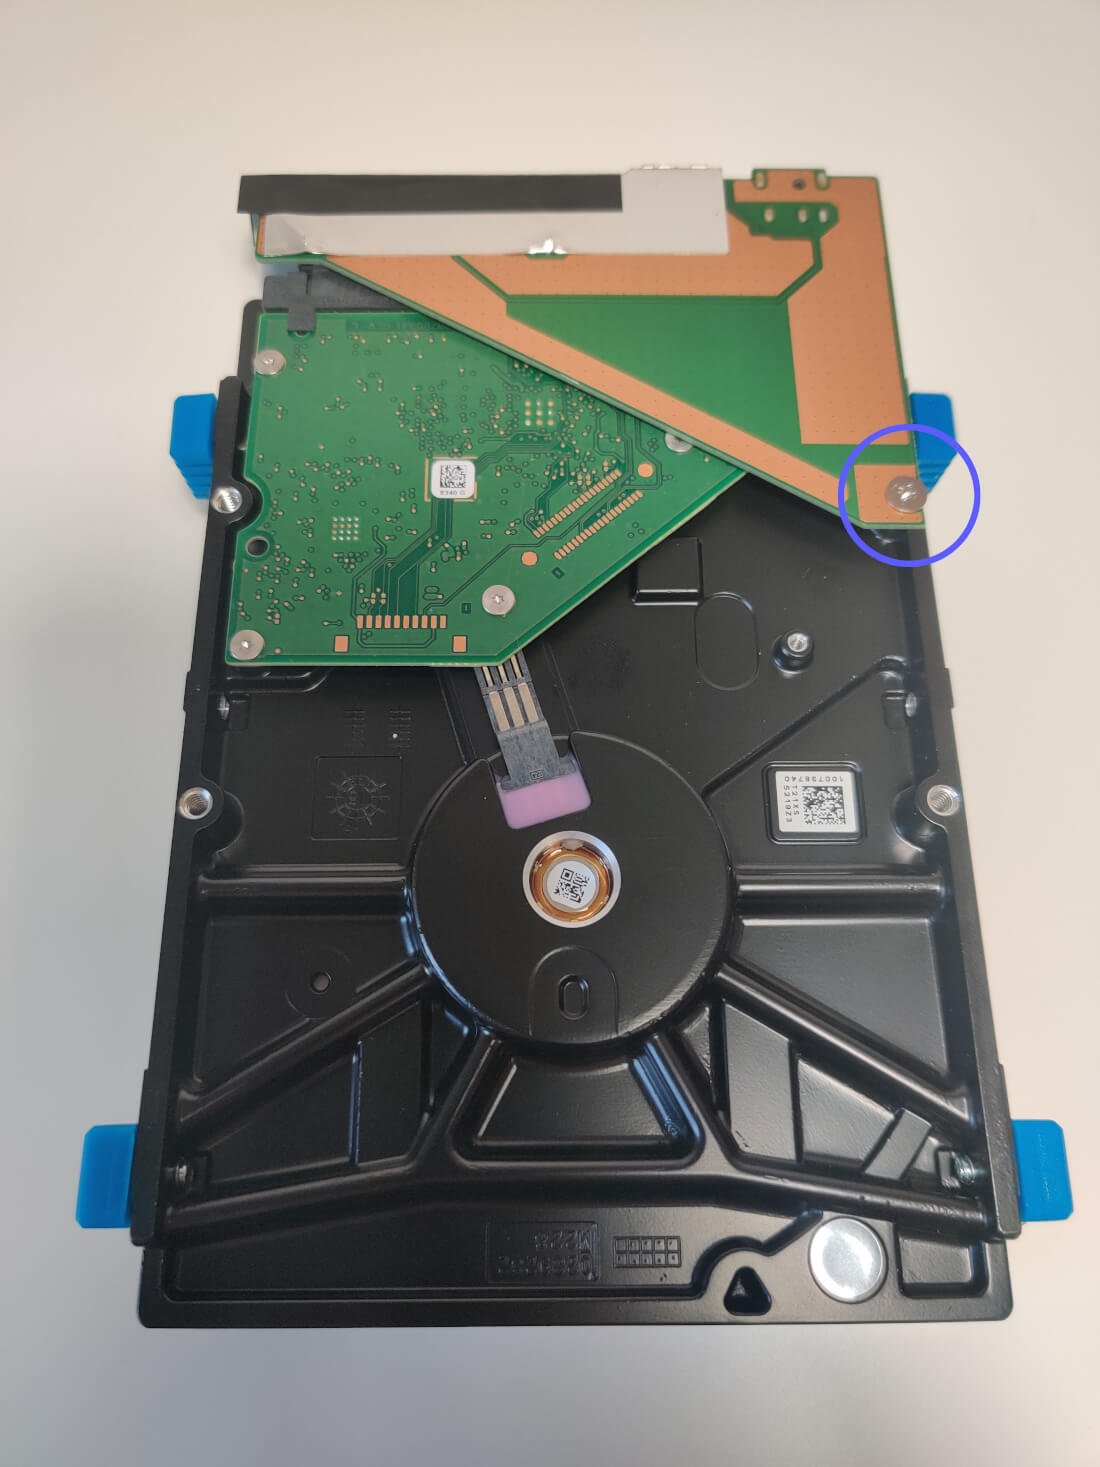
Once you opened the case, pull out the drive by holding it on its edges and tipping the case over. The drive is mounted by friction, so it won’t come out easily. Do not shake the casing though! Now, after removing the unnecessary plastic casing, you need to take out the one screw marked in the image below.
You can also remove the rubber feet and the screws holding them on, and depending on how you’ll go about mounting the drive, you might actually need to. I didn’t bother.
The next step is to flip the drive over and carefully pry off the silver shielding tape. If you carefully lift up one corner with a knife, you should be able to pull it off by that corner with your hands.
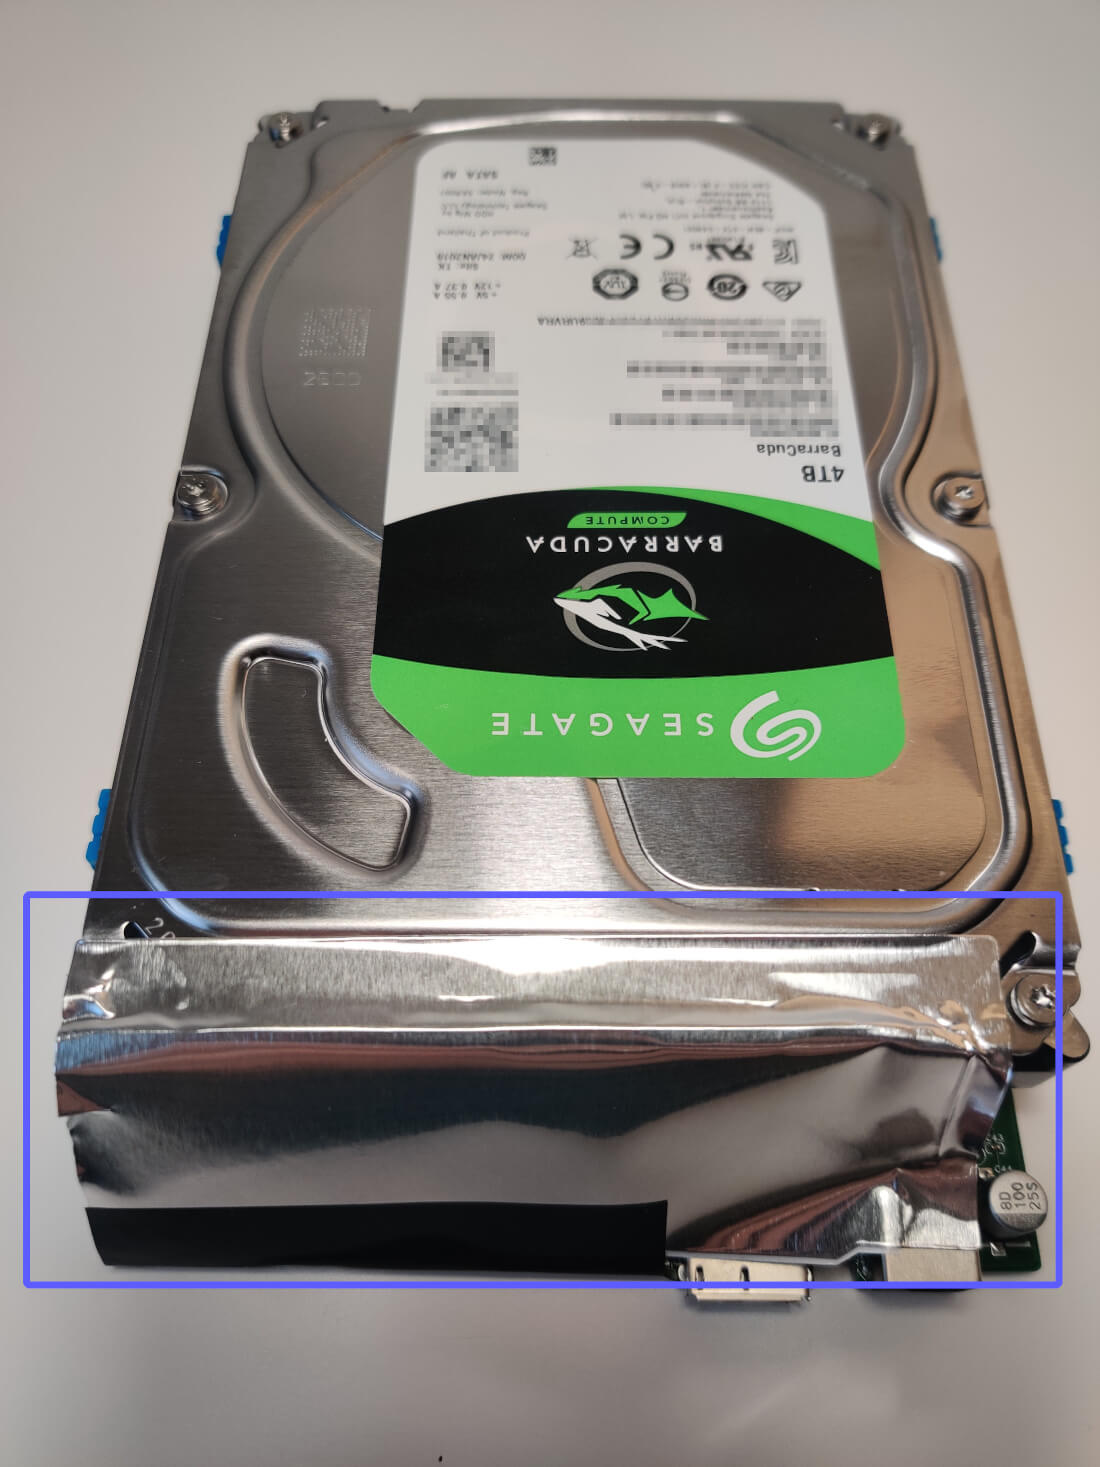
That’s it! You can now remove the SATA-to-USB doughter board by gently pulling it out and plug in the drive to your computer. It should work just like any other SATA drive would.
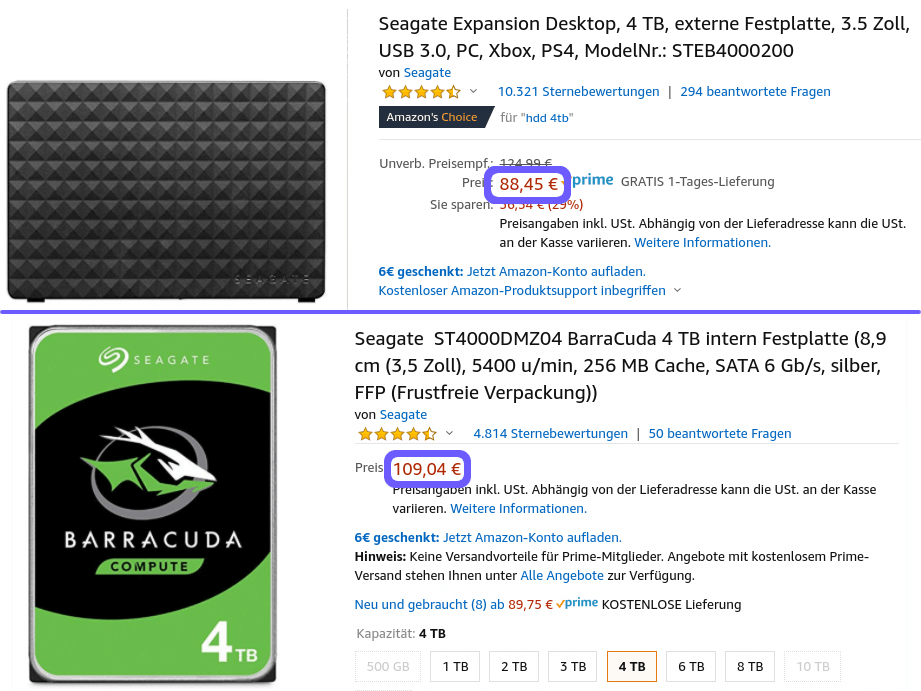
And, as you can see, this is not some sort of cheap HDD, this is a Seagate Barracuda Compute, just like the one I showed you in the price comparison. Vendors usually don’t make any claims on which exact models of HDDs they use in external drives, but for Seagate they mostly are Barracuda Computes and for Western Digital they more ofte than not are so-called white-label drives (they have a white label), which are equal to WD Red drives (the NAS ones).
Go ahead and have fun expanding the storage of your computer or server!